Artwork Guides, News, Tips and Advice
What is Bleed in Printing? Everything You Need to Know
If you’ve dabbled in graphic design or printing, you’ve likely come across the term “bleed.” But what exactly is it, and why is it essential for achieving professional-quality prints?
What Does Bleed Mean in Printing?
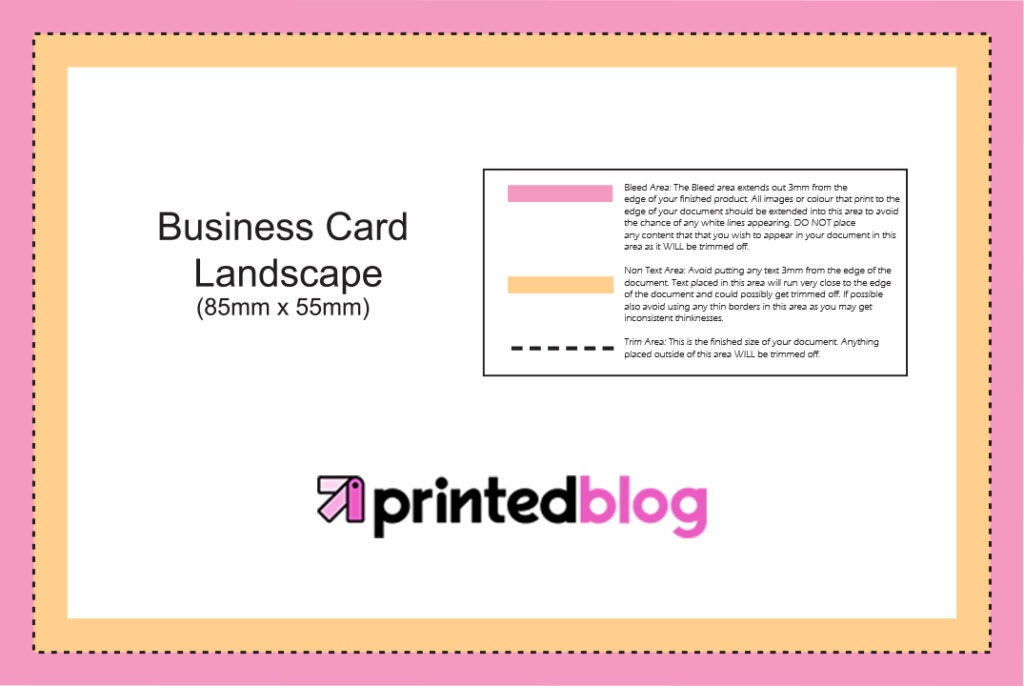
In printing, “bleed” refers to the area of a document that extends beyond the trim edge. This extra space ensures that no unprinted edges appear in the final cut, accommodating any slight movement of the paper during trimming.
At Printed.com we recommend a 3mm bleed around all sides of the print. Watch how to add bleed here.
Do all prints require 3mm Bleed?
Yes, most standard products at Printed.com require you to add 3mm bleed.
Benefits of Adding Bleed
Ensuring your designs include bleed offers several benefits:
- Prevents White Edges: Even the most precise cutting machines can have slight shifts. Bleed ensures your design extends to the edge, avoiding unwanted white borders.
- Professional Finish: Bleed gives a polished, high-quality look to your printed materials, making them appear well-crafted and thought through.
- Consistency: It maintains the integrity of your design across multiple prints, ensuring each piece looks identical even if there’s slight variation in the trimming process.
How to Create Bleed in Your Design
Here are six steps to ensure your designs incorporate bleed correctly:
1. Set Up Your Document with Bleed
When creating a new document in your design software, set the bleed area. Most design tools like Adobe InDesign, Illustrator, and even some versions of Photoshop have options for adding bleed.
2. Extend Your Background
Ensure that any background colors, images, or patterns extend to the edge of the bleed area. This way, when the paper is trimmed, these elements still reach the edge of your final product.
3. Keep Important Elements Inside the Safe Zone
While your background extends into the bleed area, ensure that all critical elements (text, logos, focal points) remain within the “safe zone,” usually about 5mm inside the trim line. This prevents them from being cut off.
4. Use Guides
Most design software allows you to add guides to help you visualise the bleed, trim, and safe zones. Use these guides to position your elements accurately.
5. Double-Check Your Design
Before sending your file to print, review your design to ensure all necessary elements extend into the bleed area and that important details remain within the safe zone.
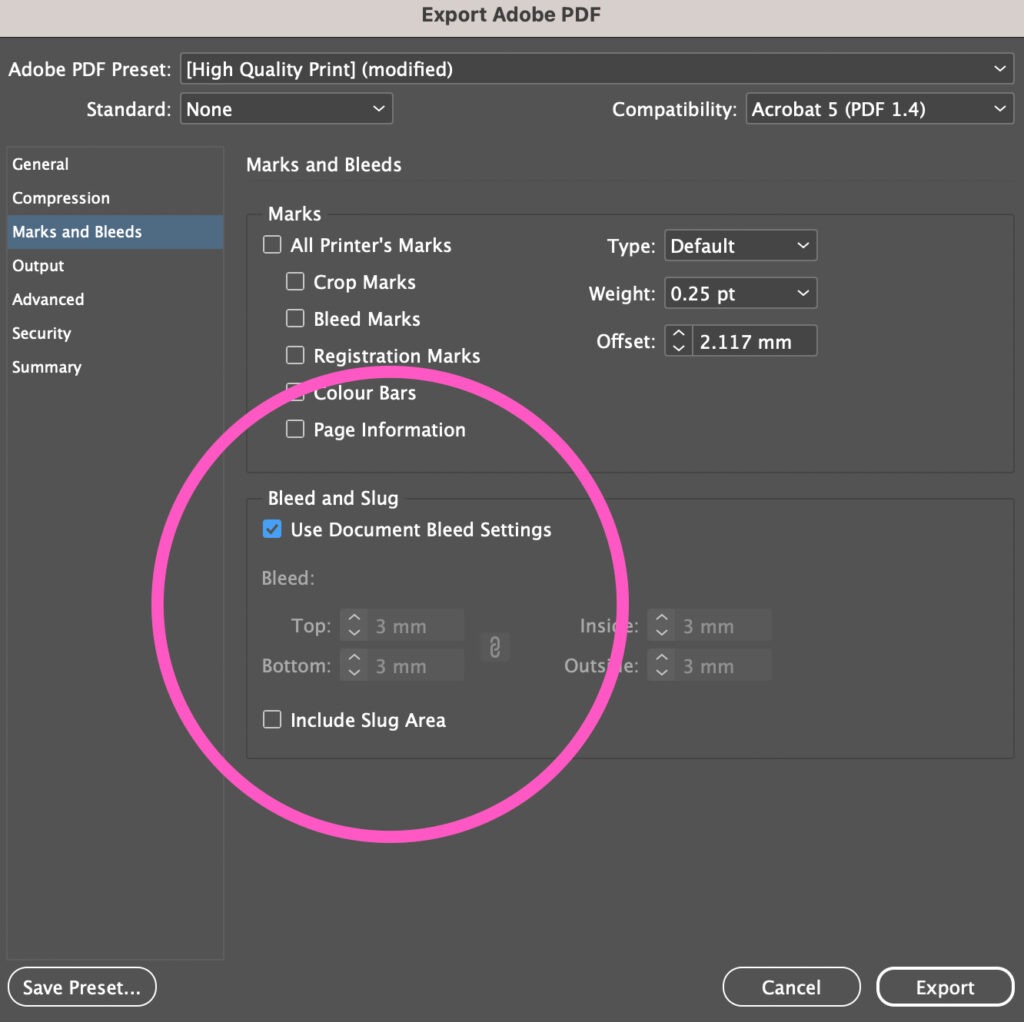
6. Export with Bleed
When you’re ready to export your design, ensure the bleed settings are included. Most software has an option to “include bleed” in the export settings. This step is crucial to ensure the printer knows to account for the bleed area when trimming.
How to add Bleed in Canva?
Bleed needs to be added to your design via file > view settings > show print bleed. Ensure your design correctly fills the bleed and then when exporting your artwork, make sure you use the ‘PDF print’ file type with ‘crop marks and bleed’ selected.
Adding bleed to your designs is a simple yet crucial step for ensuring high-quality, professional prints. By understanding and applying bleed correctly, you can elevate the quality of your printed materials and avoid common pitfalls such as white edges or inconsistent trims.
If you need assistance, contact our customer service team at theteam@printed.com. We’re here to help you achieve perfect prints every time!
About the author
Our in-house designer Becca has a love of all things creative. When she’s not designing, you can find her in Newcastle checking out independent coffee shops or getting her hands dirty with her house renovation.